Spray & Rotor Accessories
Keep your system in superior shape with a wide range of Rain Bird sprinkler parts and accessories. Our irrigation parts and sprinkler system accessories enhance installation for home or commercial settings. Choose from garden hoses, filters, flexible swing pipes and much more.
-
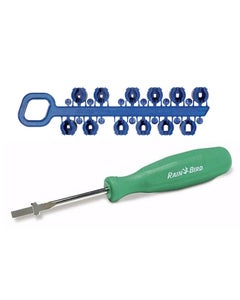 Combo Pack - 42SA and 52SA Service Kit$9.96
The perfect service kit for your 42SA and 52SA rotor sprinklers:
- Nozzle tree includes various standard angle Rain Curtain and low angle nozzles:
- Low angle: 1.0. 1.5, 2.0 and 3.0
- Rain Curtain: 1.5, 2.0, 2.5, 3.0, 4.0, 5.0, 6.0 and 8.0
- Fits on Rain Bird 5004PL-PC, 5004PL-FC, 5006PL-PC, 5006PL-FC, 5012PL-PC and 5012PL-FC and 42SA+ Plus and 52SA Series Rotors
- The universal Rain Bird rotor tool
- Flat blade screwdriver and pull-up tool all in one
- Use to adjust and lift Rain Bird rotors including 3500, 5000, 5000 Plus, 5500, Falcon 6504, 7005, 8005, EAGLE 351B, 32SA, 42SA and 52SA series
-
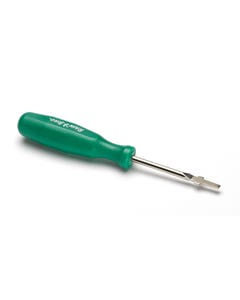 CPROTTOOL - Rotor Screwdriver & Pull-up Tool$6.97
- The universal Rain Bird rotor tool
- Flat blade screwdriver and pull-up tool all in one
- Use to adjust and lift Rain Bird rotors including 3500, 5000, 5000 Plus, 5500, Falcon 6504, 7005, 8005, EAGLE 351B, 32SA, 42SA and 52SA series
-
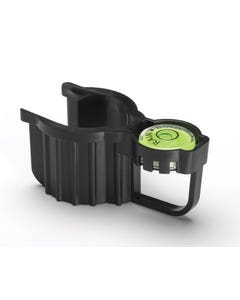 HOLDUPTOOL - Rotor Hold up Tool with LevelSpecial Price $11.20 List Price $14.94
- Combination holdup tool and bubble level makes proper rotor installation easier
- Works with Rain Bird 5000 Series, 5500 Series, EAGLE 351B, Falcon 6504, 7005 and 8005 Series Rotors
-
 Nozzle #44 Blue, 11000 Series (Must order in multiples of 10 units)$8.00
Replacing the Nozzle
- IMPORTANT NOTE: Make sure the sprinkler does not operate automatically while you are changing the nozzle. Turn off the water.
- NOTE: Make sure the snap ring is securely in place before removing the nozzle housing screws.
- Clean top of case assembly to prevent debris from falling in when nozzle housing is removed.
- Required Tools: Phillips-head screwdriver; Flat-head screwdriver.
Image 1 - Use a Phillips-head screwdriver to loosen the nozzle housing screws
Image 2 - Grasp the nozzle housing screws and lift up to separate the nozzle housing from the internal
Image 3 - Press the replacement nozzle assembly into the nozzle housing, making sure the nozzle front is flush with the outside of the housing
Image 4 - An O-ring seal is required on all nozzles.
CAUTION: If the nozzle is not flush and seated properly in the nozzle housing, the rotor may not perform properly.
11000 Nozzles Performance Chart
Learn More -
 Nozzle #48 Yellow, 11000 Series (Must order in multiples of 10 units)$8.00
Replacing the Nozzle
- IMPORTANT NOTE: Make sure the sprinkler does not operate automatically while you are changing the nozzle. Turn off the water.
- NOTE: Make sure the snap ring is securely in place before removing the nozzle housing screws.
- Clean top of case assembly to prevent debris from falling in when nozzle housing is removed.
- Required Tools: Phillips-head screwdriver; Flat-head screwdriver.
Image 1 - Use a Phillips-head screwdriver to loosen the nozzle housing screws
Image 2 - Grasp the nozzle housing screws and lift up to separate the nozzle housing from the internal
Image 3 - Press the replacement nozzle assembly into the nozzle housing, making sure the nozzle front is flush with the outside of the housing
Image 4 - An O-ring seal is required on all nozzles.
CAUTION: If the nozzle is not flush and seated properly in the nozzle housing, the rotor may not perform properly.
11000 Nozzles Performance Chart
Learn More -
 Nozzle #52 Orange, 11000 Series (Must order in multiples of 10 units)$8.00
Replacing the Nozzle
- IMPORTANT NOTE: Make sure the sprinkler does not operate automatically while you are changing the nozzle. Turn off the water.
- NOTE: Make sure the snap ring is securely in place before removing the nozzle housing screws.
- Clean top of case assembly to prevent debris from falling in when nozzle housing is removed.
- Required Tools: Phillips-head screwdriver; Flat-head screwdriver.
Image 1 - Use a Phillips-head screwdriver to loosen the nozzle housing screws
Image 2 - Grasp the nozzle housing screws and lift up to separate the nozzle housing from the internal
Image 3 - Press the replacement nozzle assembly into the nozzle housing, making sure the nozzle front is flush with the outside of the housing
Image 4 - An O-ring seal is required on all nozzles.
CAUTION: If the nozzle is not flush and seated properly in the nozzle housing, the rotor may not perform properly.
11000 Nozzles Performance Chart
Learn More -
 Nozzle #56 Green, 11000 Series (Must order in multiples of 10 units)$8.00
Replacing the Nozzle
- IMPORTANT NOTE: Make sure the sprinkler does not operate automatically while you are changing the nozzle. Turn off the water.
- NOTE: Make sure the snap ring is securely in place before removing the nozzle housing screws.
- Clean top of case assembly to prevent debris from falling in when nozzle housing is removed.
- Required Tools: Phillips-head screwdriver; Flat-head screwdriver.
Image 1 - Use a Phillips-head screwdriver to loosen the nozzle housing screws
Image 2 - Grasp the nozzle housing screws and lift up to separate the nozzle housing from the internal
Image 3 - Press the replacement nozzle assembly into the nozzle housing, making sure the nozzle front is flush with the outside of the housing
Image 4 - An O-ring seal is required on all nozzles.
CAUTION: If the nozzle is not flush and seated properly in the nozzle housing, the rotor may not perform properly.
11000 Nozzles Performance Chart
Learn More -
 Nozzle #60 Black, 11000 Series (Must order in multiples of 10 units)$8.00
Replacing the Nozzle
- IMPORTANT NOTE: Make sure the sprinkler does not operate automatically while you are changing the nozzle. Turn off the water.
- NOTE: Make sure the snap ring is securely in place before removing the nozzle housing screws.
- Clean top of case assembly to prevent debris from falling in when nozzle housing is removed.
- Required Tools: Phillips-head screwdriver; Flat-head screwdriver.
Image 1 - Use a Phillips-head screwdriver to loosen the nozzle housing screws
Image 2 - Grasp the nozzle housing screws and lift up to separate the nozzle housing from the internal
Image 3 - Press the replacement nozzle assembly into the nozzle housing, making sure the nozzle front is flush with the outside of the housing
Image 4 - An O-ring seal is required on all nozzles.
CAUTION: If the nozzle is not flush and seated properly in the nozzle housing, the rotor may not perform properly.
11000 Nozzles Performance Chart
Learn More -
 Nozzle #64 Red, 11000 Series (Must order in multiples of 10 units)$8.00
Replacing the Nozzle
- IMPORTANT NOTE: Make sure the sprinkler does not operate automatically while you are changing the nozzle. Turn off the water.
- NOTE: Make sure the snap ring is securely in place before removing the nozzle housing screws.
- Clean top of case assembly to prevent debris from falling in when nozzle housing is removed.
- Required Tools: Phillips-head screwdriver; Flat-head screwdriver.
Image 1 - Use a Phillips-head screwdriver to loosen the nozzle housing screws
Image 2 - Grasp the nozzle housing screws and lift up to separate the nozzle housing from the internal
Image 3 - Press the replacement nozzle assembly into the nozzle housing, making sure the nozzle front is flush with the outside of the housing
Image 4 - An O-ring seal is required on all nozzles.
CAUTION: If the nozzle is not flush and seated properly in the nozzle housing, the rotor may not perform properly.
11000 Nozzles Performance Chart
Learn More -