Parts & Accessories
View the entire catalog of Rain Bird parts and accessories, ranging from the essentials to system enhancements.
Parts & Accessories
-
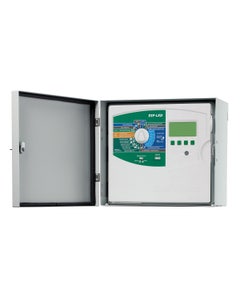 LXMM - Metal Cabinet for ESP-LX Series ControllersSpecial Price $835.72 List Price $1,114.29
- Metal cabinet for Rain Bird ESP-LX Series Controllers
- Powder-coated steel for additional protection from the elements
- Includes all necessary mounting bolts, nuts and washers
- NOTE: controller not included
-
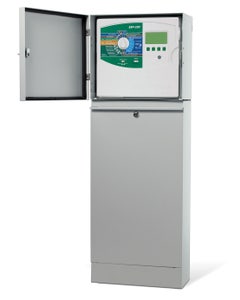 LXMMPED - Metal Pedestal for ESP-LX Series ControllersSpecial Price $1,126.66 List Price $1,547.28
- Metal pedestal for Rain Bird ESP-LX Series Controllers
- Powder-coated steel for additional protection from the elements
- Includes all necessary mounting bolts, nuts and washers
- LXMM metal cabinet required (sold separately)
- NOTE: controller not included
-
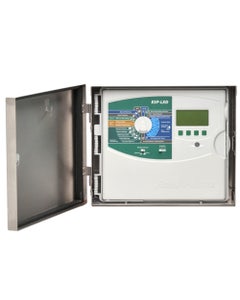 LXMMSS - Stainless Steel Cabinet for ESP-LX Series ControllersSpecial Price $1,669.12 List Price $2,292.26
- Stainless steel cabinet for Rain Bird ESP-LX Series Controllers
- Provides additional protection from the elements
- Includes all necessary mounting bolts, nuts and washers
- NOTE: controller not included
-
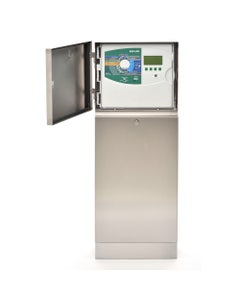 LXMMSSPED - Stainless Steel Pedestal for ESP-LX Series ControllersSpecial Price $2,086.40 List Price $2,865.32
- Metal pedestal for Rain Bird ESP-LX Series Controllers
- Stainless steel for additional protection from the elements
- Includes all necessary mounting bolts, nuts and washers
- Requires LXMSS (sold separately)
- NOTE: controller not included
-
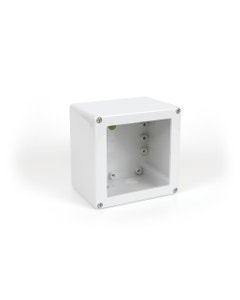 NEMACAB - NEMA Enclosure for 1502 and 3002 MonitorSpecial Price $250.00 List Price $267.50NEMA Enclosure for PT3002 pulse transmitter Learn More
 -
 Nozzle #44 Blue, 11000 Series (Must order in multiples of 10 units)$8.00
Replacing the Nozzle
- IMPORTANT NOTE: Make sure the sprinkler does not operate automatically while you are changing the nozzle. Turn off the water.
- NOTE: Make sure the snap ring is securely in place before removing the nozzle housing screws.
- Clean top of case assembly to prevent debris from falling in when nozzle housing is removed.
- Required Tools: Phillips-head screwdriver; Flat-head screwdriver.
Image 1 - Use a Phillips-head screwdriver to loosen the nozzle housing screws
Image 2 - Grasp the nozzle housing screws and lift up to separate the nozzle housing from the internal
Image 3 - Press the replacement nozzle assembly into the nozzle housing, making sure the nozzle front is flush with the outside of the housing
Image 4 - An O-ring seal is required on all nozzles.
CAUTION: If the nozzle is not flush and seated properly in the nozzle housing, the rotor may not perform properly.
11000 Nozzles Performance Chart
Learn More -
 Nozzle #48 Yellow, 11000 Series (Must order in multiples of 10 units)$8.00
Replacing the Nozzle
- IMPORTANT NOTE: Make sure the sprinkler does not operate automatically while you are changing the nozzle. Turn off the water.
- NOTE: Make sure the snap ring is securely in place before removing the nozzle housing screws.
- Clean top of case assembly to prevent debris from falling in when nozzle housing is removed.
- Required Tools: Phillips-head screwdriver; Flat-head screwdriver.
Image 1 - Use a Phillips-head screwdriver to loosen the nozzle housing screws
Image 2 - Grasp the nozzle housing screws and lift up to separate the nozzle housing from the internal
Image 3 - Press the replacement nozzle assembly into the nozzle housing, making sure the nozzle front is flush with the outside of the housing
Image 4 - An O-ring seal is required on all nozzles.
CAUTION: If the nozzle is not flush and seated properly in the nozzle housing, the rotor may not perform properly.
11000 Nozzles Performance Chart
Learn More -
 Nozzle #52 Orange, 11000 Series (Must order in multiples of 10 units)$8.00
Replacing the Nozzle
- IMPORTANT NOTE: Make sure the sprinkler does not operate automatically while you are changing the nozzle. Turn off the water.
- NOTE: Make sure the snap ring is securely in place before removing the nozzle housing screws.
- Clean top of case assembly to prevent debris from falling in when nozzle housing is removed.
- Required Tools: Phillips-head screwdriver; Flat-head screwdriver.
Image 1 - Use a Phillips-head screwdriver to loosen the nozzle housing screws
Image 2 - Grasp the nozzle housing screws and lift up to separate the nozzle housing from the internal
Image 3 - Press the replacement nozzle assembly into the nozzle housing, making sure the nozzle front is flush with the outside of the housing
Image 4 - An O-ring seal is required on all nozzles.
CAUTION: If the nozzle is not flush and seated properly in the nozzle housing, the rotor may not perform properly.
11000 Nozzles Performance Chart
Learn More -
 Nozzle #56 Green, 11000 Series (Must order in multiples of 10 units)$8.00
Replacing the Nozzle
- IMPORTANT NOTE: Make sure the sprinkler does not operate automatically while you are changing the nozzle. Turn off the water.
- NOTE: Make sure the snap ring is securely in place before removing the nozzle housing screws.
- Clean top of case assembly to prevent debris from falling in when nozzle housing is removed.
- Required Tools: Phillips-head screwdriver; Flat-head screwdriver.
Image 1 - Use a Phillips-head screwdriver to loosen the nozzle housing screws
Image 2 - Grasp the nozzle housing screws and lift up to separate the nozzle housing from the internal
Image 3 - Press the replacement nozzle assembly into the nozzle housing, making sure the nozzle front is flush with the outside of the housing
Image 4 - An O-ring seal is required on all nozzles.
CAUTION: If the nozzle is not flush and seated properly in the nozzle housing, the rotor may not perform properly.
11000 Nozzles Performance Chart
Learn More -
 Nozzle #60 Black, 11000 Series (Must order in multiples of 10 units)$8.00
Replacing the Nozzle
- IMPORTANT NOTE: Make sure the sprinkler does not operate automatically while you are changing the nozzle. Turn off the water.
- NOTE: Make sure the snap ring is securely in place before removing the nozzle housing screws.
- Clean top of case assembly to prevent debris from falling in when nozzle housing is removed.
- Required Tools: Phillips-head screwdriver; Flat-head screwdriver.
Image 1 - Use a Phillips-head screwdriver to loosen the nozzle housing screws
Image 2 - Grasp the nozzle housing screws and lift up to separate the nozzle housing from the internal
Image 3 - Press the replacement nozzle assembly into the nozzle housing, making sure the nozzle front is flush with the outside of the housing
Image 4 - An O-ring seal is required on all nozzles.
CAUTION: If the nozzle is not flush and seated properly in the nozzle housing, the rotor may not perform properly.
11000 Nozzles Performance Chart
Learn More